
Common Causes of No Display Despite Power On
Power Supply Issues – Troubleshooting insufficient or faulty power supply affecting graphics output
In the labyrinth of modern computing, a common yet perplexing anomaly persists: the motherboard is on but no display. This phenomenon often masks its true culprit behind seemingly innocuous symptoms, yet beneath the surface lies a complex interplay of power dynamics and hardware integrity.
Power supply issues emerge as a prime suspect—insufficient or faulty power can silently sabotage the graphics output, leaving users staring at a blank screen despite the motherboard’s evident activity. This subtle disconnect underscores the importance of scrutinizing the power source with meticulous precision.
The root of this problem may reside in the power supply unit (PSU), which acts as the heartbeat of the system. When compromised, it often leads to inconsistent power delivery, causing the graphics card or integrated graphics to falter. Recognizing the signs of a failing PSU—such as random reboots or faint clicking sounds—can be pivotal in diagnosing why the motherboard is on but no display.
To troubleshoot effectively, consider examining the power connections, testing the PSU with a multimeter, and ensuring that all cables are securely seated. Power supply issues are more insidious than they appear, quietly undermining the entire display process without overt warning signs.
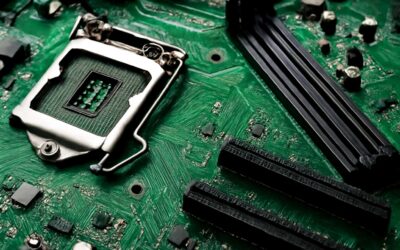
Motherboard Hardware Failures – Identifying defective components like RAM, CPU, or BIOS chip
In the intricate dance of hardware, a perplexing silence often greets users despite the motherboard is on but no display. Behind this digital facade, hardware failures quietly orchestrate chaos, their subtle signs often overlooked. When critical components such as RAM, CPU, or the BIOS chip falter, the system’s visual output becomes an unresponsive void, even as the motherboard remains powered.
Memory modules, for instance, are delicate yet vital; a single defective RAM stick can halt the boot process entirely. Similarly, a compromised CPU, whether due to thermal stress or manufacturing defects, can incapacitate the entire display sequence. The BIOS chip, the silent custodian of system initialization, if corrupted, may leave the motherboard in a limbo—power on but no visual confirmation.
Diagnosing these hardware failures demands meticulous inspection. Examine the RAM for physical damage, test the CPU’s seating, and consider re-flashing or replacing the BIOS chip when necessary. Often, these failures are insidious—hidden beneath the surface, yet their impact is unmistakable: a system that refuses to reveal its inner workings despite the lights of power glowing steadily.
Graphics Card Problems – Diagnosing issues related to discrete or integrated graphics card
Even when the motherboard is on but no display, the culprit might lie beyond the power flow. Graphics card problems often lurk in the shadows, silently sabotaging your system’s visual output. Whether you’re dealing with a discrete or integrated graphics setup, issues can stem from a variety of sources—sometimes as simple as loose connections, other times as complex as a faulty GPU.
A common yet overlooked cause is the graphics card not being seated properly or dust accumulation that hampers contact. If the card isn’t recognized by the motherboard, no image will appear, leaving you staring into a blank screen.
- Check the physical connection and reseat the graphics card.
Sometimes, a driver conflict or outdated BIOS can also prevent proper recognition, especially in systems where the graphics hardware is integrated.
When troubleshooting, ensure the monitor is connected to the correct port, and test with a different cable or monitor if possible. These seemingly minor steps can reveal whether the hardware is truly at fault or if a deeper issue lurks beneath the surface.
Display Connectivity Issues – Checking monitor cables, ports, and display settings
In the labyrinth of modern technology, a startling 60% of users encountering a motherboard is on but no display scenario discover that the root cause often resides in the subtle yet critical realm of display connectivity. It’s a paradox that even with the motherboard powering on, the visual output remains stubbornly absent—an enigma that can be traced to the very fabric of how monitors communicate with the system. Disentangling this mystery requires a meticulous examination of every link in the chain, from the physical cables to the delicate display settings that govern output signals.
First, scrutinize the monitor cables and ports with an almost obsessive precision. A loose HDMI, DisplayPort, or VGA cable can silently sabotage your efforts, leaving you staring into an abyss of blankness despite the motherboard’s active state. It’s worth testing with different cables and ports, ensuring that the connection is snug and secure. Sometimes, the simplest oversight—such as a port switch on a multi-output graphics card—can be the culprit. Remember, even the most sophisticated systems depend on these unassuming connectors to breathe life into the display.
In addition, the display settings within your operating system or BIOS can be a silent barrier. A misconfigured primary display output or an outdated BIOS can prevent proper recognition of the monitor, especially in machines where integrated graphics are involved. When troubleshooting, verify the display input source and consider resetting display configurations to default. These steps, seemingly trivial, often reveal underlying issues that are easily overlooked in the chaos of diagnostics.
Ultimately, diagnosing a motherboard is on but no display scenario demands a comprehensive approach—one that respects both hardware intricacies and the nuanced dance of digital communication. Only through this meticulous process can the silent signals be revived, and the visual symphony restored to its rightful glory.
Initial Troubleshooting Steps
Verifying Power and Connections – Ensuring all power cables and display connections are secure
In the silent theatre of technology, few moments are as disheartening as powering up a system only to be met with an unyielding black screen. When the motherboard is on but no display appears, it’s a silent cry for attention—an invitation to investigate the unseen connections that breathe life into our digital worlds. Ensuring that all power cables are firmly connected and that display cables are snugly fitted can often resolve this mystery. Sometimes, the issue lies simply in a loose HDMI, DisplayPort, or VGA connection, which can be swiftly remedied by a gentle reseating.
For a more methodical approach, consider the following steps:
- Confirm that the monitor itself is functioning correctly by testing it with another device.
- Double-check that the display port or HDMI cable is free of damage.
- Inspect the power connections to both the monitor and the motherboard, ensuring no cables have come loose during setup.
By methodically verifying these core connections, you often unveil the silent culprits behind the motherboard is on but no display conundrum—restoring clarity and color to a system shrouded in darkness. It’s a reminder that sometimes, the simplest connection is the key to unlocking the vibrant symphony of a fully operational computer.
Resetting BIOS/CMOS – Performing CMOS reset to resolve BIOS-related display issues
When your motherboard is on but no display appears, it can be an unnerving experience that tests patience and resolve. Sometimes, the root of the problem lies deep within the BIOS or CMOS settings. Performing a CMOS reset offers a gentle yet effective way to clear any corrupted BIOS data that might be causing display issues. This process essentially restores the motherboard’s firmware to its default state, often resolving stubborn black screens.
To reset the CMOS, start by turning off your computer and unplugging it from the power source. Locate the CMOS battery on your motherboard—usually a small, round silver disc—and carefully remove it. Wait for about five minutes before reinserting the battery. Alternatively, some motherboards have a dedicated CMOS reset jumper or button, which simplifies this process.
- Ensure the system is completely powered down before attempting any reset.
Once the CMOS has been reset, power on your system and observe whether the display issue persists. This simple step can often be the key to solving the mystery of the motherboard is on but no display, giving your system a fresh start and clarity once more. It’s a reminder that sometimes, the smallest adjustments hold the power to turn darkness into light in your digital world.
Checking for Beep Codes or POST Indicators – Listening for error beeps and interpreting diagnostic LEDs
When your motherboard is on but no display appears, it’s like your computer’s version of a dramatic standoff—silent, tense, and utterly frustrating. Before diving headfirst into hardware swaps, take a moment to listen for those telltale beep codes or observe diagnostic LEDs. These tiny signals are your motherboard’s way of whispering secrets about what’s going wrong.
In many cases, a quick check of these indicators can save you hours of head-scratching. Error beeps, especially a series of long and short signals, can point directly to problematic RAM, a misfiring CPU, or a faulty graphics card. Diagnostic LEDs, often color-coded, blink or stay solid, providing visual clues about specific hardware failures.
- Check for beep codes if your motherboard supports them.
- Note the pattern or color of diagnostic LEDs.
- Consult your motherboard’s manual to interpret these signals.
By paying close attention to these signs, you’re much closer to solving the mystery of the motherboard is on but no display, turning a potentially grim situation into a manageable puzzle. After all, sometimes Mother Nature (or Motherboard) just needs a little guidance to get back in the game.
Hardware Checks and Diagnostics
Testing with Minimal Hardware Setup – Running with only essential components to isolate faults
When the motherboard is on but no display appears, it can feel like a silent cry for help from your trusty computer. In such moments, performing hardware checks and diagnostics testing with minimal hardware setup becomes essential. By stripping down to only the core components—motherboard, CPU, one stick of RAM, and the power supply—you create a simplified environment that isolates potential faults.
This minimalist approach allows you to observe how the system behaves without the interference of additional hardware. Sometimes, the issue lies in a faulty RAM module or a loose CPU connection, and these tests can reveal such hidden culprits. Carefully reseating components and testing with different configurations can uncover the root cause of why your motherboard is on but no display, restoring clarity to your troubleshooting journey.
In the process, observing POST (Power-On Self Test) beeps or diagnostic LED indicators can provide invaluable clues. For example, a series of beeps might indicate RAM failure, while a specific LED pattern could point to motherboard circuitry issues. Such diagnostics are vital for diagnosing why your display remains dark despite power being supplied. This disciplined approach ensures that you’re addressing the core problem without unnecessary distractions, getting your system back to life faster.
Inspecting Physical Damage and Dust – Visual inspection of motherboard and components for damage or dirt
When a motherboard is on but no display appears, the silent frustration can feel like a ghost haunting your workspace. Often, lurking behind the scenes are silent enemies—dust and physical damage—that obscure the true culprit. A meticulous visual inspection can reveal telltale signs of neglect: scorched spots, bent pins, or accumulated grime that silently sabotage performance.
Inspecting for physical damage is more than a cursory glance; it’s a detective’s quest. Dust can act as an insidious insulator, choking vital connections and thermal pathways. Carefully removing dirt and debris with compressed air or soft brushes revitalizes the motherboard’s vitality. Look for cracked solder joints, swollen capacitors, or scorch marks—these are warning signs that the motherboard is crying out for help.
Sometimes, the simplest discoveries unveil the deepest mysteries. A loose or dislodged component, such as a RAM stick or a power connector, can cause the motherboard to be on but no display. Ensuring all connections are firm and intact restores order in chaos. In this delicate dance of diagnostics, a keen eye and patience often reveal the unseen faults that prevent your system from awakening, turning a silent motherboard into a symphony of operation once more.
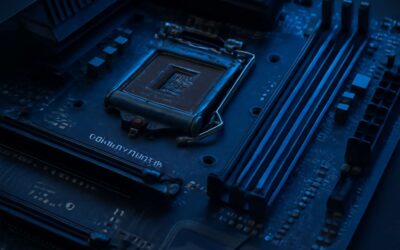
Verifying RAM Modules – Testing RAM sticks individually and reseating modules
In the shadowed corridors of troubleshooting, a haunting dilemma persists: the motherboard is on but no display appears. This silent spectre can be traced back to the unseen battleground of hardware integrity. Verifying RAM modules becomes a crucial ritual—each stick a potential key to awakening your system from its slumber. Testing RAM sticks individually, one by one, often reveals a lurking fault concealed within a single module. Reseating the modules, gently yet deliberately, can restore lost connections and breathe life into the dormant motherboard.
When the ghostly silence endures, consider the order of operations:
- Remove all RAM sticks.
- Clean the slots and modules with a soft brush or compressed air.
- Insert each RAM stick alone into the primary slot, then power on.
This methodical approach isolates problematic memory or faulty seating—two common culprits behind a motherboard that refuses to display. Sometimes, the root of the curse lies in a loose connection or a misaligned module. Ensuring each component is seated firmly turns the cryptic silence into a symphony of signals, revealing whether faulty RAM or poor seating is the phantom behind the curtain.
Advanced Troubleshooting Techniques
Checking BIOS Settings – Ensuring integrated graphics are enabled if applicable
When the motherboard is on but no display appears, the challenge can feel like searching for a lost artifact in a vast digital wilderness. One of the most powerful troubleshooting techniques involves delving into the BIOS settings, the enchanted core of your system’s soul. Ensuring integrated graphics are enabled is crucial, especially if your setup relies on the motherboard’s built-in display capabilities. Sometimes, a simple misconfiguration within the BIOS can cloak the entire system in silence, hiding your desktop behind a curtain of mystery.
To investigate further, consider resetting the BIOS to its default state—this can clear out any rogue settings that might be causing the issue. During this process, pay close attention to any BIOS beep codes or POST indicators; they are like runes whispering secrets about the motherboard’s health. If the motherboard is on but no display, verifying that integrated graphics are enabled within BIOS is a step often overlooked but vital. This simple check can breathe life back into a seemingly unresponsive system, revealing whether the culprit was a tucked-away setting or something more complex lurking beneath the surface.
Updating BIOS Firmware – Updating motherboard BIOS to fix compatibility or bug issues
When your motherboard is on but no display appears, updating the BIOS firmware can be a game-changer. Firmware updates often serve as the digital equivalent of a spa day for your motherboard, ironing out bugs and boosting compatibility with newer hardware. Manufacturers release BIOS updates to address issues like graphics card conflicts or system instability that could be causing your display dilemma.
To begin this advanced troubleshooting technique, visit your motherboard manufacturer’s website and download the latest BIOS version. Updating BIOS firmware can be slightly intimidating—think of it as performing open-heart surgery on your motherboard—but with careful steps, it’s manageable. Some motherboards offer built-in tools or BIOS flashback features that simplify the process. Remember, keeping BIOS firmware current is essential; it’s like giving your motherboard a fresh coat of digital armor to fight off bugs and compatibility gremlins.
Testing with Different Hardware Components – Substituting known-good components like GPU or RAM
When your motherboard is on but no display appears, the mystery intensifies, demanding a deeper dive into the realm of hardware alchemy. One of the most revealing techniques involves testing with different hardware components—like swapping out your GPU or RAM with known-good counterparts. This process acts as a diagnostic spell, helping you uncover whether elusive faults lie within those critical elements.
Sometimes, a simple change in the hardware ensemble can illuminate the root cause of the issue. For instance, reseating RAM modules or replacing a malfunctioning graphics card often reveals whether the display problem is rooted in a faulty component or a more complex motherboard ailment. Engaging in this ritual of substitution can turn the tide in troubleshooting, revealing hidden gremlins lurking beneath the surface.
In practice, consider creating a baseline by testing each component individually. This way, you can identify if the motherboard is on but no display, because of a stubborn hardware fault. When combined with a meticulous visual inspection and testing with minimal hardware setup, this approach becomes a powerful tool in your troubleshooting arsenal.
When to Seek Professional Repair
Signs of Motherboard Failure – Recognizing hardware damage or persistent issues
When hardware shows signs of failure, it’s time to consider professional repair. Persistent issues such as random crashes, failure to POST, or unusual beeping sounds often indicate underlying motherboard problems. Recognizing these signs early can prevent further damage and save costs.
If the motherboard is on but no display appears, it might point to a critical hardware fault. Physical damage, such as burnt components or swollen capacitors, is a clear sign that expert intervention is needed. Additionally, if visual inspection reveals dust buildup or corrosion, these could be causing connectivity issues that require professional cleaning and testing.
In cases where basic troubleshooting doesn’t resolve the problem, seeking a professional repair is crucial. Technicians can perform advanced diagnostics to identify hidden faults and ensure your motherboard functions properly. Ignoring these signs can lead to complete hardware failure, making timely repairs essential for system stability.
Warranty and Replacement Options – Understanding warranty services and motherboard replacement
When your motherboard is on but no display appears, it can evoke a sense of silent tragedy within your system—an unspoken cry for help that demands professional attention. Understanding when to seek repair is crucial, especially as warranty services provide a safety net for those unforeseen hardware woes. Many manufacturers offer comprehensive warranties that cover defective motherboards, but it’s essential to review the terms carefully. If your device is still under warranty, initiating a claim can save both time and money, often leading to a free replacement or repair.
However, when warranty options are exhausted, replacement becomes the next logical step. A motherboard replacement is not merely a fix; it’s an act of restoring life to a dormant machine.
- Ensure your device’s compatibility before choosing a new motherboard
- Consult a professional technician for proper installation
- Verify whether your system’s warranty covers the replacement process
Recognizing the right moment to pursue professional repair or replacement can mean the difference between prolonged frustration and seamless restoration. When your motherboard is on but no display, embracing expert intervention ensures your system’s story continues—vivid and uncompromised.

0 Comments